Basement Wall Repair Using Grip-Tite Wall Anchors
John C. Huang, Ph.D., PE
Course Outline
Cracked or bulged basement wall is one of the most frequently encountered problems by the structural engineers engaged in the residential work. In this lesson, you will be introduced to the Grip-Tite wall anchor system, which is a very effective system to restore the structural integrity of the basement wall where the primary cracks are in the horizontal direction or are due to the hydrostatic pressure or the lateral earth pressure. This course also includes a case study using Grip-Tite wall anchor system. At the end of the course you need to take a multiple-choice quiz to earn PDH units.
Learning
Objectives
At
the conclusion of this course, the student will understand:
- the possible causes of basement cracks;
- the working mechanism of Grip-Tite wall anchor system; and
- the installation method of Grip-Tite wall anchor system.
Course Content
Cracked or bulged basement wall is one of the most frequently encountered problems by the structural engineers engaged in the residential work. Usually the basement wall cracking or bulging can be attributed to one of the following causes:
- Lack of bracing at the top of the basement wall. In this case, the primary cracks are along the horizontal direction. This condition usually occurs in the basement walls parallel to the floor joists.
- High lateral pressure due to inadequate drainage on the outside face of the basement wall. In this case, the primary cracks are usually along the horizontal direction.
- Lateral pressure exerted by large tree roots in the vicinity of the basement wall. In this case, the primary cracks are usually along the horizontal direction.
- Insufficient flexural strength of CMU basement wall. In this case, the primary crack is usually horizontal and occurs at the wall mid-height or at the elevation where the wall thickness changes.
- Poor bearing materials or a broken water pipe under the basement wall. In this case, the primary cracks are usually in diagonal direction. The crack width is wider at the bottom than at the top.
- Sliding of entire foundation. This usually happens to the buildings situated on the fill with a slope. In this case, the crack pattern varies.
Grip-Tite wall anchor system is a very effective system to restore the structural integrity of the basement wall where the primary cracks are in the horizontal direction or are due to the hydrostatic pressure or the lateral earth pressure. The horizontal crack width and wall bulging can be reduced significantly by installing the Grip-Tite wall anchors.
The typical Grip-Tite wall anchor system consists of one 11"x18" steel wall plate, one earth anchor made from two wall plates, and one 3/4" diameter steel anchor rod.
For the Grip-Tite wall anchor system to function properly, anchor rods are usually spaced 4' to 5' on center, and are located below the primary horizontal crack so that the wall plates can straddle the primary horizontal crack. Anchor rods are drilled through the basement wall, extended approximately 7 to 10 feet into the outside earth, and connected to the earth anchors embedded 3 to 4 feet below the exterior grade.
If the wall bulging is a major concern, the contractor can excavate a 2-foot wide trench adjacent to the wall so that the wall bulging can be minimized by tightening the anchor rods gradually. A CMU wall with severe and multiple cracks should also be reinforced and grouted solid to restore its integrity after the wall is pulled back to the vertical position.
It should be pointed out that failure to address the ultimate cause of the
cracked and/or bulged foundation wall could result in a premature failure of
this system.
In summary, the Grip-Tite wall anchor system not only stabilizes the deteriorating basement walls, but also improves the appearance of the cracked and bowed basement walls. It is author's opinion that the Grip-Tite wall anchors could also be used to repair the leaning retaining walls. To learn more about the Grip-Tite wall anchor system, click on the following topics:
- Wall Anchor Installation Video (07:04)
- Basement Wall Repair Photos - Before and After
- How Does The Wall Anchor System Work?
- Bowed, Cracked or Leaning Basement Walls
- Find A Installer
Case Study: The Walker Residence in Fairfax, VA
Building Description: Built in 1976, the two-story wood framed structure is supported by 12" CMU basement walls on four sides. CHC Engineering, LLC, conducted the structural investigation in 1999.
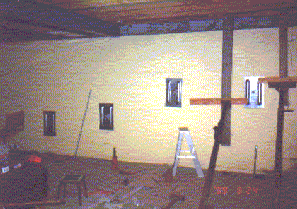
Condition before Repair: The cracks under investigation were located in the east basement wall. There were tow diagonal cracks, one vertical crack and two horizontal cracks. The cracked wall had significant bulging toward inside. The dominant horizontal crack was approximately 5/8" wide, and was located at the mid-height of the wall. Other cracks were 1/8" to 1" wide. See Figure 1 below for additional details.
Cause: The cracked wall was caused by the lateral pressure exerted by the roots of a two-foot diameter tree, which was within 3' of the basement wall. Although the tree was cut two years ago, the tree stump was still alive at the time of the investigation.
Repair Recommendations: (a) Excavate and remove the tree stump; (b) Install four Grip-Tite wall anchors at 3 to 4 foot on center; (c) Where the wall cracked extensively. CMU wall was grouted solid in every other cell.
Condition after Repair: Crack width was reduced by 80% to 95% and wall was almost plumb (see Figure 2). The owner was very satisfied.
|
|
|
|
Figure 1 - Before Repair |
Figure 2 - After Repair |

Related Links
For
additional technical information related to this subject, please visit the following
websites or web pages:
Concrete in Practice - Cracks in Concrete Basement Walls
Basement Crack Repair
Bulging Concrete Block Basement Wall
***
QuizOnce you finish studying the above course content, you need to take a quiz to obtain the PDH credits.
![]()
DISCLAIMER:
The materials contained in the online course are not intended as a representation
or warranty on the part of PDH Center or any other person/organization named
herein. The materials are for general information only. They are not a substitute
for competent professional advice. Application of this information to a specific
project should be reviewed by a registered professional engineer. Anyone making
use of the information set forth herein does so at their own risk and assumes
any and all resulting liability arising therefrom.
![]()